Hairstyle-With-Style-logo.png

Painting Realistic Hairstyles: The Ultimate Guide

Cover image by David Belliveau

Creating a realistic, touchable-looking hairstyle to top off your digital portrait is absolutely within your reach!

Ever spent hours trying to get the hairstyle on your digital portrait to look realistic and touchable, but not knowing how to fix it? We’ve all been there! 
 

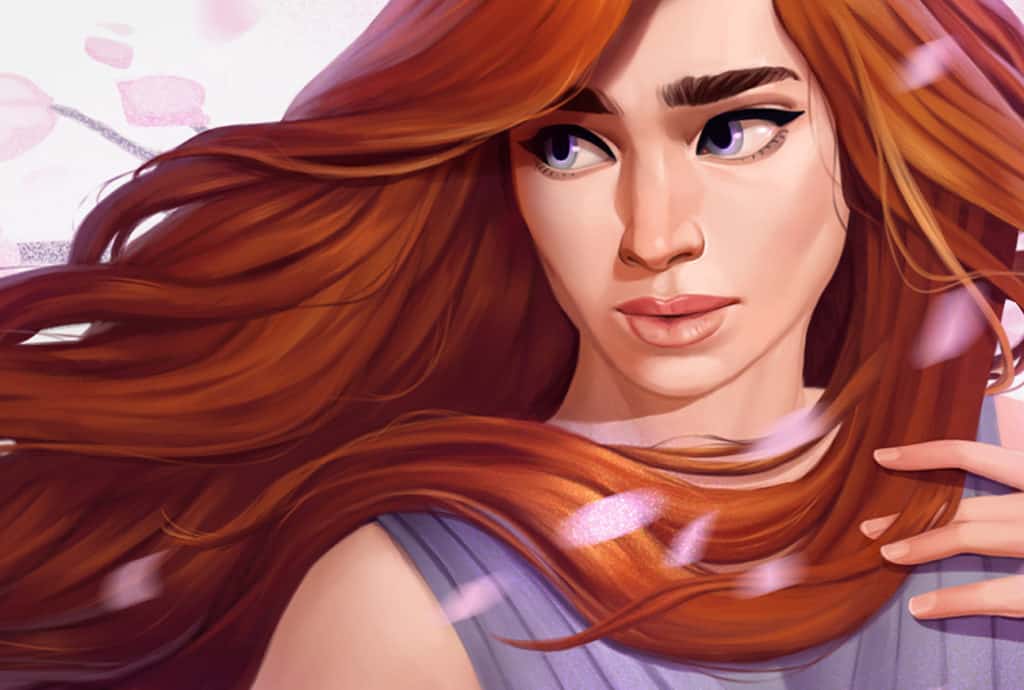
Learning to paint hair gets a lot easier (and faster) when you have a set of steps you can follow and practice. In this Ultimate Guide, I’ll walk you through the  process that I use to paint hairstyles on all of my digital portraits (except the bald ones 😁). 

After we’ve got hairstyles down, we’ll move into painting beards/stubble, eyebrows, and eyelashes. 

Follow along, and have fun!

Start with a Sketch of Your Hairstyle

Before we can begin painting our hairstyle, we need a sketch of it. And in order to create a sketch, we need an idea of what kind of hairstyle shapes we’re aiming for.

In this first video, I walk you through how to create your sketch, starting with finding a reference picture to inspire you, and then breaking down the shapes within the hairstyle.

(This video is part of the Sketching Hairstyles module within the Digital Painting Academy. That module is where I teach the 3 Pillars of a good haircut, which I mention in the first minute of this video.)

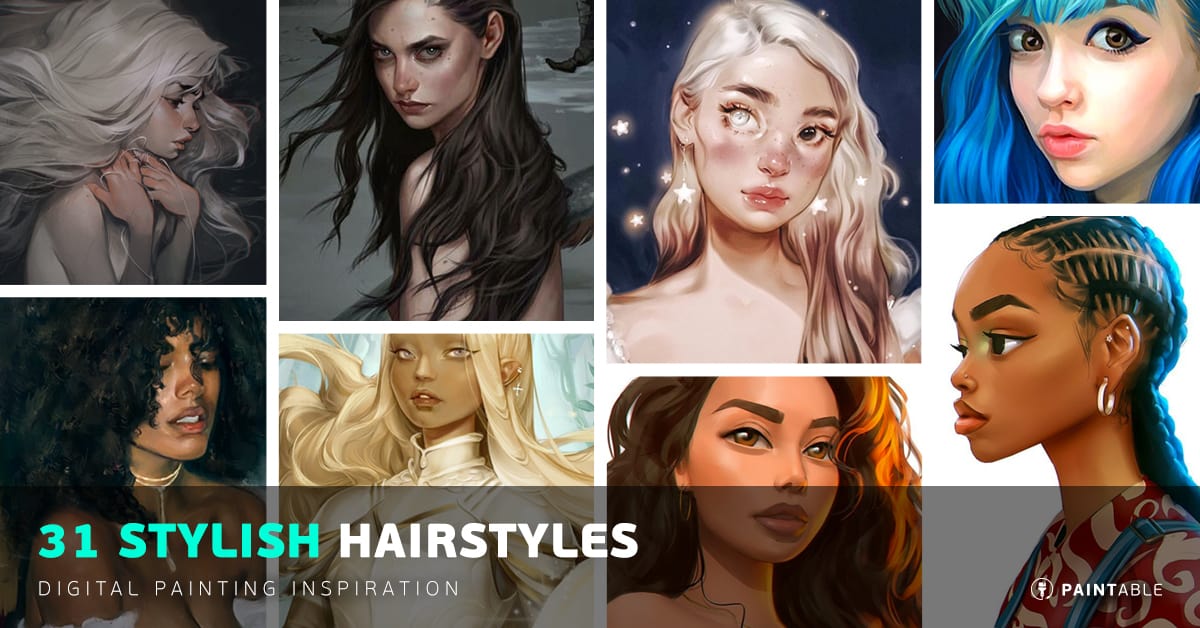
Here are the Pinterest boards I show in the video:
📌 Hairstyle With Style artworks
📌 Examples of hair blowing in the wind

👉 Want to skip the sketch of the head, and go straight to sketching the hairstyle? Try out the downloadable worksheets in this lesson.

Practice with Texture Brushes on a Lock of Hair

If you’re new to experimenting with texture brushes that can be used to create realistic locks of hair quickly, watch this video. 

You’ll see the different texture brushes I use, and how I use them with the mixer brush to blend colors and add details. Follow along, practicing on small locks of hair, and experimenting with different texture brushes to see which ones work best for your style.

After perfecting locks of hair, and getting used to different brushes and techniques, you can move on to your full hairstyle.

👉 You can download the brushes I use in the video for free here.

Render the Hair in Values

Once we have the basic shapes of the hairstyle defined in a sketch, we can begin rendering. For beginners, it’s often easier to learn to render using values  (grey-scale) before figuring out what colors will achieve the effect you’re looking for in your artwork.

Watch this video to get started rendering hair in values- the example here is a beard, but the techniques are applicable to hairstyles too. 

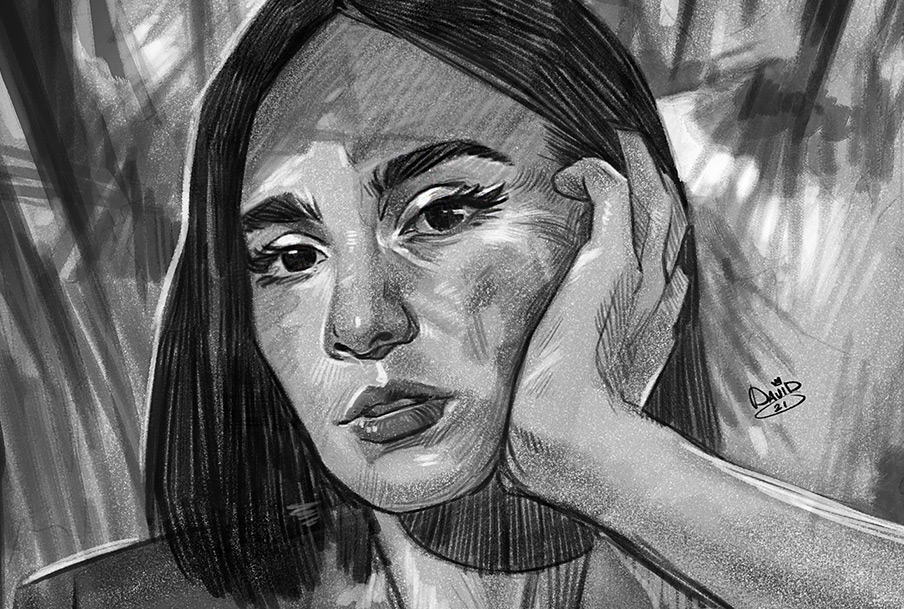
☝ This is an older video so bear with me here. 😁 The steps are still relevant and can help you up your value-rendering skills!

5 Steps to Perfect Hair From Imagination

Once you have a sketch of your hairstyle, and have practiced rendering locks of hair, it’s time to render your hairstyle in color- the key here is to add colors in layers.

This video walks you through how to create these layers, each one adding more depth and dimension to the hair:

  1. Start with a base of the darkest color.
  2. Design the shadows and light by adding the major areas that the light will hit the hair. We talk about the different tools to use in this step.
  3. Paint each lock of hair on the next layer, using a texture brush (examples given in the video).
  4. Add hue shifts to make the hair glow. I show you a few different hue shifts that you can experiment with- try a few to see what works best for the effect you’re after.
  5. Add details in just the right places using finer texture brushes and overlapping highlights. I give you some tips on how and where to do this to achieve the illusion that details are everywhere.

You can download the brushes that I use in this video for free here:

Beards, Eyebrows, and Eyelashes

Once you have some hairstyle painting basics down, you can move on to painting other types of hair. 

Stubble beards, 5 o’ clock shadows, eyebrows, and eyelashes are all similar to painting hairstyles, but take a slightly different technique and tool-set.

This video walks you through the steps to create a realistic stubble beard. Using the right brushes will make this really quick and easy- I show you which ones I use.

Creating eyebrows that don’t look “pasted on” was a bit mystifying until I discovered this technique to blend the skin into them properly. Take a look at this quick tutorial, and you may never paint brows the same way again!

And finally, eyelashes can make or break the eyes on your portrait. I used to just paint little lines for the lashes and wonder why they looked fake- there’s a super easy and quick way to improve the look of your lashes.

Watch this video to see how.

Great Examples of Beautiful Digitally Painted Hairstyles

You’ve covered a lot of ground in this Ultimate Guide to Painting Hair! Take it slow, focusing on improving just one step at a time, and you’ll be looking back at how far you’ve coming in no time!

For a bit of inspiration to help you set your own goals, check out these beautiful examples of creative hairstyles by amazing artists.

Keep practicing, and happy painting!

FREE CLASS + CHALLENGE

Learn To Paint Hairstyles With Style

Join the 7-day Challenge, get FREE access to 145+ minutes of masterclass video training on painting hair, and learn to paint your best hairstyle EVER!

Claim Your Free Spot!

The post Painting Realistic Hairstyles: The Ultimate Guide appeared first on Paintable.

compare-2-iilustration_v2-1024x576.jpg

Photoshop vs Procreate for Digital Painting

Itching to know what it’s like to switch from a Wacom tablet with Photoshop to an iPad Pro with Procreate?

I’m shaking things up in a big way today! 

In all of my tutorials and course modules so far, I’ve been teaching you using Photoshop on a Wacom tablet with a MacBook.  I’ve been dying to try out Procreate on an iPad Pro, so I can give you tips and tricks using those tools.  And today, I’m bringing you along as I get started!

In this video, I unbox my new 12.9 inch iPad Pro, and give you my first impression of the Procreate app. 

While working on the same illustration using the same process on both setups, I give you my thoughts on:

  • What it’s like to work on an iPad after years of using a Wacom tablet and MacBook.
  • What are the big differences between the 2 hardware setups
  • Comparing the feel of the Wacom pen vs the Apple pen
  • The plusses and minuses I’ve experienced using Photoshop vs Procreate 
  • The biggest difficulties I’ve seen as a professional artist working on the iPad
  • Is the Procreate app powerful enough for professional work as an illustrator?

Photoshop vs Procreate - Digital Painting - Paintable

Let’s get into it!

If you’re getting started with Procreate, rather than starting with a portrait like I did, I recommend starting with a smaller illustration like in the Ultimate Beginners Guide here

And if you’d like to set up your workspace like mine, here’s what I’m using:

I’d love to hear your first impressions of Procreate!  What did you find most difficult to get used to, and what are your favorite tips for using it?  Put it in the comments below!

I’ve also prepared a gift for you – here it is:

10 ‘MUST HAVE’ BRUSHES FOR PAINTING

Free Download:

Designed to Paint Incredible Portrait Details!

The post Photoshop vs Procreate for Digital Painting appeared first on Paintable.

AD_025_FromImagination_2.jpg

How to Paint Anything: The ULTIMATE Guide to Rendering

Painting from imagination can be tough… where are you meant to put the highlights? And what about the shadows?

The key is understanding how different types of light work.

Luckily, there’s an 8-step “recipe” to painting light from imagination – which I cover in-depth in my program, Illustration From Imagination. And today, I wanted to give you a sneak-peak of one of these lessons!

Today’s lesson is a COMPLETE walkthrough of my rendering process, in which I show you:

  • How to break complex shapes down so you can paint even the most difficult objects,
  • How to add different light sources completely from imagination,
  • Exactly where to place the most important highlights, shadows, and details in every painting,

And much more:

You can download the exercise files mentioned in the video for both Photoshop and other tools right here.  Enjoy!

10 ‘MUST HAVE’ BRUSHES FOR PAINTING

Free Download:

Designed to Paint Incredible Portrait Details!

The post How to Paint Anything: The ULTIMATE Guide to Rendering appeared first on Paintable.

Portrait_Brushes_Small_CTA_Text-2.png

How to Paint Realistic Eyes: The Ultimate Guide

They say that eyes are windows to the soul…

From our hidden thoughts to our deepest emotions, eyes can tell us an awful lot about someone. If we wish to paint a truly expressive portrait, it’s vital to learn how to paint realistic eyes.

Let’s jump right in!

STEP 1: Sketch An Outline

1. Begin your rough outline on a midtone background

How to Paint Realistic Eyes, Step 01

Using a relatively large brush, begin to sketch the outline of your eye. If you aren’t 100% familiar with eyes, I HIGHLY recommend you use a reference photo.. it’s the best way to learn!

You can use any brush you want, but make sure you don’t go into too many details. You are just building a basic ‘​roadmap’ for your painting.

Tip: When sketching, going into too much detail will slow you down and make your life more difficult. Avoid the temptation by selecting slightly larger brushes.

(RELATED: Why You Should Start Your Painting With a Midtone Background)​

2. Develop your sketch, and don’t be afraid to erase and re-draw lines

How to Paint Realistic Eyes, Step 02

It’s actually fairly difficult to sketch on a tablet. Don’t get frustrated! The beauty of digital painting is that you can delete and re-draw your lines as many times as you need to.

Remember: This is not meant to be polished linework! It is simply a roadmap for your painting. I’ll show you how to paint realistic eyes in time, for now keep it sketchy and loose.

STEP 2: Rendering The Eye

The ‘Brush and Cut’ Method

Before we begin rendering in detail, it is important you understand one of the most common techniques in digital painting. I like it call it the Brush and Cut method.

The basic principle is this:

  1. Create a new layer
  2. Brush on a shape (usually with a soft brush)
  3. Cut one or more edges out of this shape (usually with a hard eraser)

Lets have a look at an example:

1. Merge the sketch and background, then create a new layer

How to Paint Realistic Eyes, Step 03

The first step is to merge your sketch with your background. I personally like to use Ctrl/Command+Alt+Shift+E to merge everything to a new layer on top. This way you still have your sketch as a separate layer, in case you need to go back to it in the future.

Then, create a new layer by pressing Ctrl/Command+Shift+N.

2. Add shading to the eyeball with a soft, round brush

How to Paint Realistic Eyes, Step 04

On the new layer, begin to add some shading around the outside of the eyeball. Do this by painting just outside of the lines of the eye.

3. ‘Cut’ away the values outside of the eyeball with a hard-edged eraser

How to Paint Realistic Eyes, Step 05

Erase everything that spills outside of the outlines of the eye.

As you can see, the Brush and Cut method allows us to very easily create areas of values that have a soft, gradient edge on one side, and a hard-cut edge on the other.

This has allowed us to paint the basic shading around the outside of the eye, giving it a 3D look.

Note how rough everything is still looking at this stage. That’s totally ok, don’t get frustrated!

Remember: The beauty of this method is that ​each new element you create is on a new layer. You can keep playing around with it, brushing and cutting the shape without fear of wrecking anything you’ve already painted.

And if everything is looking too light or dark, you can play around with the layer’s Opacity in the ‘Layers’ panel.

4. Use variations of this method to continue rendering

You don’t have to Brush and Cut with a soft brush and hard eraser. You could just as well brush in areas of values with a harder brush, then fade out the edges with a softer brush.

5. Use the Marquee Tool to Paint a Perfectly Circular Iris

You don’t have to paint everything by hand. Often you will get better results by using the other tools at your disposal, such as the Elliptical Marquee Tool (keyboard shortcut: M).

I first erased the iris from my sketch. I then made a selection with the Elliptical Marquee Tool on a new layer, and filled it with light gray. As it was on a new layer I could use the Free Transform Tool (Ctrl/Command+T) to reposition it.

6. Tip: Blending With the Smudge Tool

How to Paint Realistic Eyes, Step 09

One very useful tool for blending is the Smudge tool. I prepared a tool preset for you which contains my favourite Smudge settings. You can find it in the downloadable brush files.

> Click Here to Download Tutorial Brushes

You can use the Smudge tool to blend lines in your painting, and smoothen out hard edges.

(Related4 Essential Techniques for Blending in Photoshop)

7. Keep Rendering the eye!

How to Paint Realistic Eyes, Step 07

Keep painting values bit by bit. Make sure to start with the big areas of high and low values, before zooming in and painting in the little details with a smaller brush.

Here is a tip you might find useful if you find yourself getting caught up in the details too soon.

Besides some of the techniques mentioned above, there isn’t an exact ‘science’ to rendering. It is largely a matter of taking the time to study your reference image . Make sure to keep rendering even if you’re feeling frustrated. And of course, practice, practice, practice!

TIP: To see my full rendering process, and learn about many more tips and techniques (such as using Liquify to fix proportions or Adjustment Layers to boost contrast) make sure to watch the full video.

STEP 3: Adding Eye Details

1. Adding Details in the Highlights

How to Paint Realistic Eyes, Step 11

You don’t need to go adding intricate details to every square inch (or pixel) of your painting. In fact, sometimes less is more.

Details in key areas (ie. extreme highlights and shadows) will be much more noticable. Focus on these, and you will create the illusion that the whole piece is intricately detailed.

I personally like to start by using a textured brush to add highlights.

2. …Then the Shadows

How to Paint Realistic Eyes, Step 12

Still using a textured brush, I will then begin to add some shadow details. I paint everything on a new layer, so that I can go back and erase it, using the Brush and Cut method to blend it into the painting.

3. Adding Details to the Iris

How to Paint Realistic Eyes, Step 13

Use a small, light brush to paint in lines around the iris. Then, go over and blend them with the smudge tool to make sure the lines aren’t too sharp.

4. Penciling in the Eyelashes

How to Paint Realistic Eyes, Step 14

On a new layer, begin with a big brush, to paint in the basic shape the eyelashes will occupy. Then drop the opacity, and paint individual eyelashes over this shape with a fine brush.

5. Pro-Tip: Adding the Eyelash Highlights

How to Paint Realistic Eyes, Step 16

Here’s a tip for creating extra realism in the eyelashes:

As you’ve painted the eyelashes on a new layer, you can now Ctrl/Command+Click on the layer’s Thumbnail in the Layer icon to make a selection of the eyelashes.

Hide the selection (Cmd/Ctrl+H), and select a light, soft brush. Brush over the selected area to create highlights for your eyelashes.

Then, go to Edit > Transform > Skew and skew the highlights slightly towards one side. This will create the illusion of a few highlighted eyelashes poking out in between the rest.

6. Painting Details in the Eyebrows

How to Paint Realistic Eyes, Step 10

The trick to painting hair is to think of it as a geometric shape, rather than a collection of thousands of individual hairs. Paint the overall shape first, then add individual hairs in key areas (highlights + shadows).

(RelatedHow to Paint Hair Quickly and Effectively)

STEP 4: Post-Production

1. Add the Glossy Highlights

How to Paint Realistic Eyes, Step 13

OK so this one’s technically more of a detail than post-production work. But it makes such a big difference that I wanted to save it till last.

Depending on your light source, you will want to paint in a few reflection spots on your eye. These will give the eye a glossy, wet look and really make them POP.

2. Tweak the Brightness/Contrast

How to Paint Realistic Eyes, Step 14

Add a Brightness/Contrast adjustment layer to your painting by clicking the Adjustment Layer icon in the Layers panel.

Make a few small tweaks to up the contrast and give your painting a bit more of a ‘punch’. Be careful not to overdo it, however!​

3. Add Some Noise

How to Paint Realistic Eyes, Step 15

This step is optional, but I find that especially when painting skin, adding a bit of noise can go a long way in making the details pop.

To do this, merge your painting to a new layer (Ctrl/Cmd+Alt+Shift+E)​, then go to Filter > Add Noise.

Depending on the size of your canvas you will need to play around with the options. Make sure to add a touch, don’t overdo it. Often less is more!

4. Paint the Shadow Casted by the Upper Eyelid

How to Paint Realistic Eyes, Step 16

Using the Brush and Cut method, add a highlight to the top of the eyeball, and erase away everything that spills over the top eyelid.

5. Add Final Touches With the Sharpen Tool

How to Paint Realistic Eyes, Step 17

The Sharpen Tool is perfect to add little spots of increased details throughout key areas of your paintings. Use it in moderation and don’t overdo it (stop me if you’ve heard this before!).

I would recommend using the Sharpen tool on a new layer, by selecting “Sample All Layer’s” in the toolbar at the top. This way all changes are created to the top layer, and you can actually go back and erase parts of them using the Brush and Cut method.

Final Step: Admire Your Perfect Pair of Eyes!

As creatives we often have a tendency to be unnecessarily hard on ourselves. Sit back and enjoy the fruit of your labor! And remember, the key to learning digital painting is to practice, practice, practice.

If you’d like feedback on your work just post it in our Paintable Facebook Group!

Learn to Paint Your Own

 Eye-Catching

 Masterpiece!

10 ‘MUST HAVE’ BRUSHES FOR PAINTING

Free Download:

Designed to Paint Incredible Portrait Details!

The post How to Paint Realistic Eyes: The Ultimate Guide appeared first on Paintable.